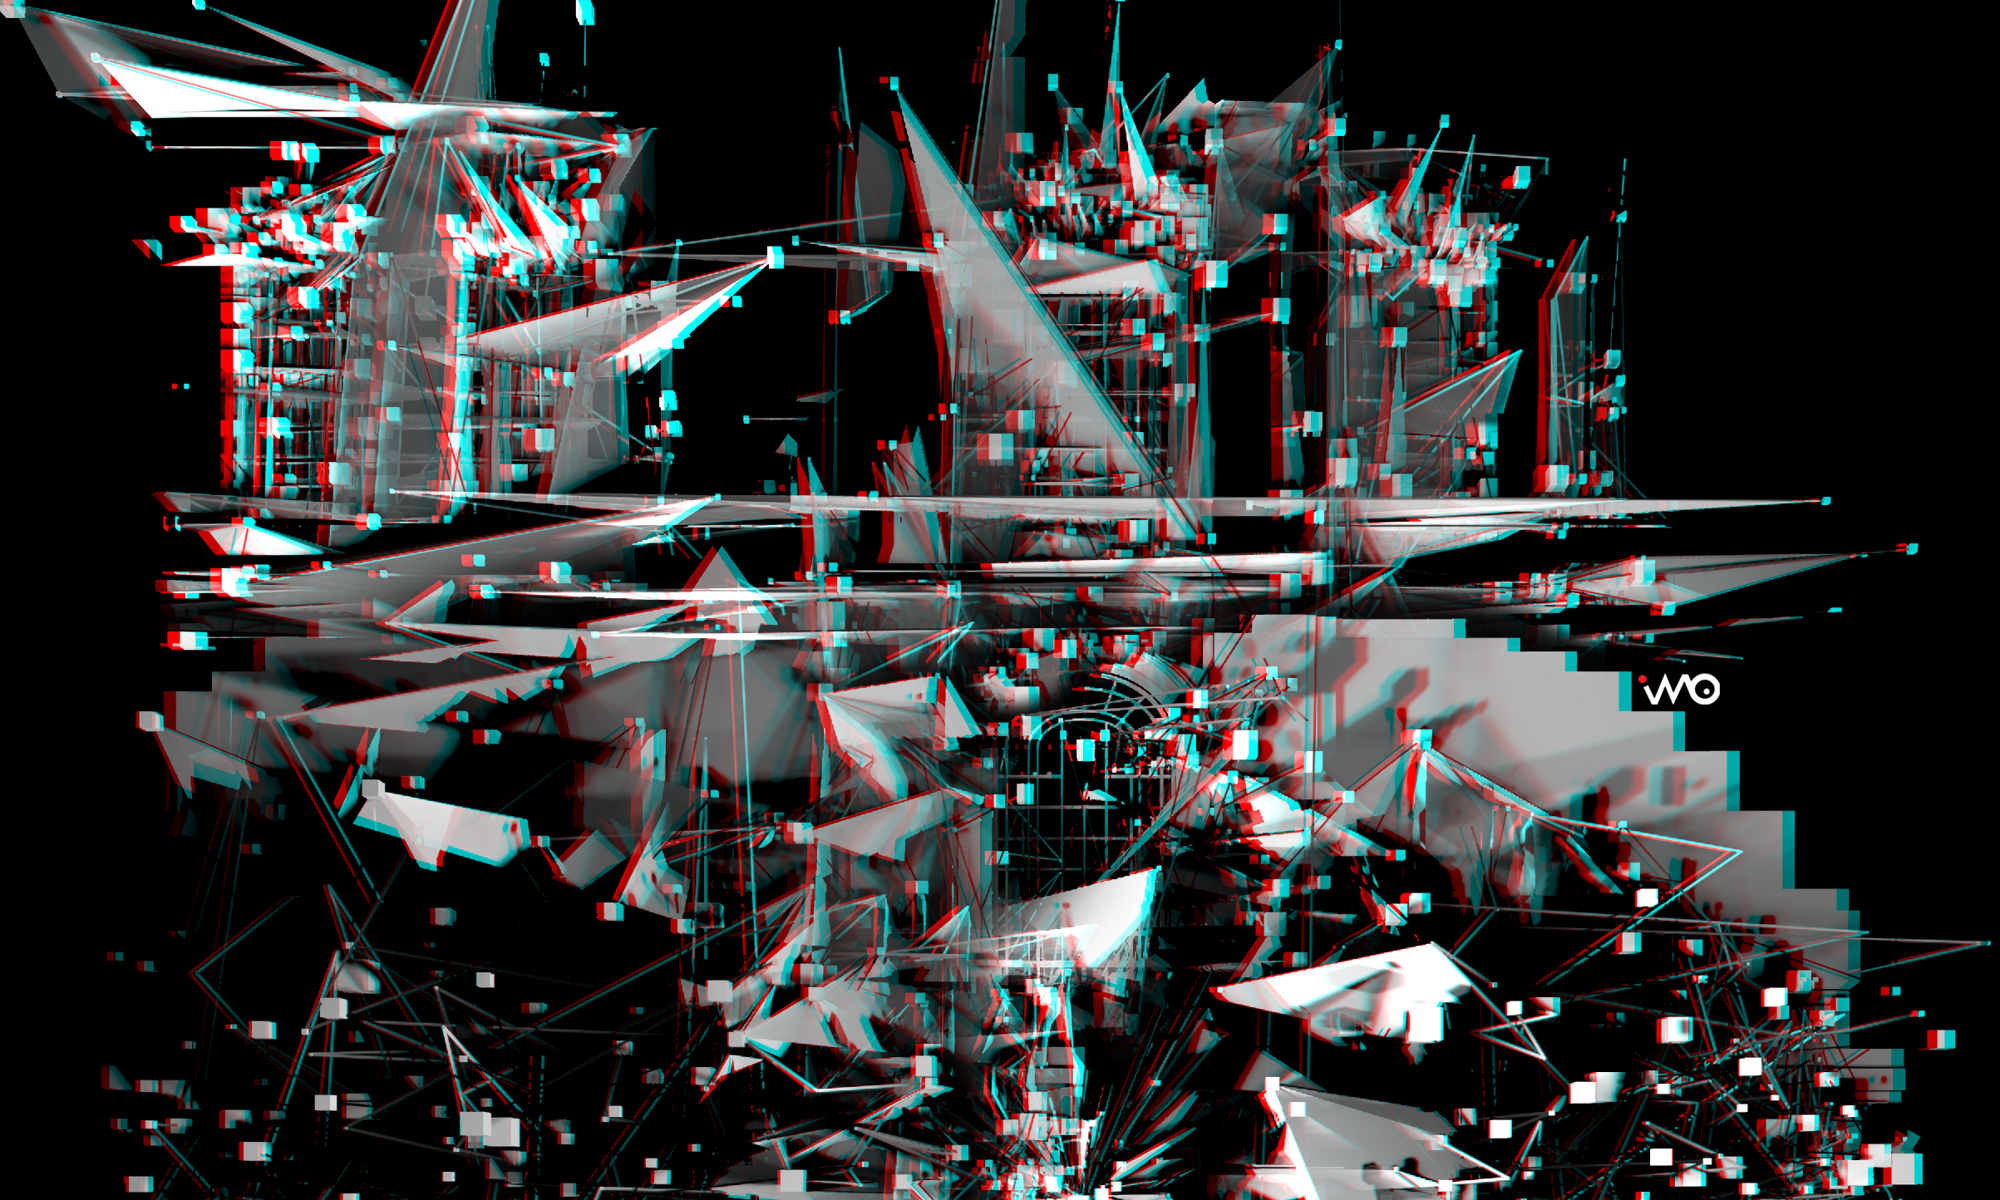
LIQUID HORIZONS — an immersive video installation (at Fixir Gallery, Veszprem) by Ivó Kovács, reconstructed as a fully navigable 360° space.
In its physical form, the work encloses the visitor in a 4.2 × 4.2 m room of four seamless projected walls — a single, uninterrupted synthetic space with no doors, no paths, no horizon to hold on to. The viewer’s own body becomes the only fixed point of reference.
Six scenes unfold without narrative — glitch corridor, brutalist labyrinth, biological vein networks, geometric core, spectral veils, liquid-architecture, synthetic horizons — juxtaposing Trauma-Arbeit and utopia in a digital realm, somewhere between architectural critique and algorithmic aesthetics.
This 360° version was rebuilt in TouchDesigner and rendered in 8K from the exact center of the room — on the one spot where visitor could stand.
🎧 Use headphones. 📱 Drag the screen or move your phone to look around. 🥽 Best experienced in a VR headset in 8K.
A ComfyUI workflow that re-skins a photographed image sequence into a completely different material world, while keeping the original architecture, perspective and camera motion intact.
Built for a 4-wall projection piece: the output tiles seamlessly on the X axis, so the left and right edges of every frame match up when the image is wrapped around a room.
This workflow produced one of the scenes in Liquid Horizons (2026), a 360° looped panoramic projection in a 4.2 × 4.2 m enclosed room, exhibited at F|X|R Médialabor, Veszprém. Released as-is, with the settings that were actually used.
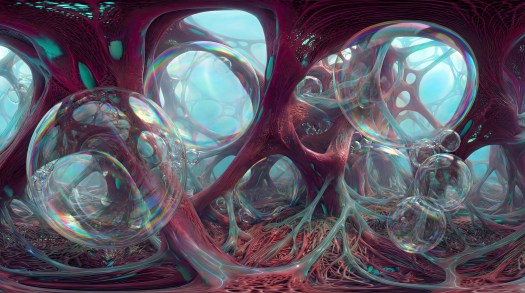
Source frame — abandoned brutalist stairwell, itself an AI render (3840×2160)Style reference — bio-organic membrane with oxygen bubblesOutput — the stairwell re-skinned as organic tissue (3072×1728)
The stairwell’s arches, openings and depth layering survive the transfer — they just become tissue instead of concrete.
1. What this actually does
It is not img2img with a high denoise and hope. Four independent systems constrain the render, and each one is there to solve a specific failure mode:
System
Nodes
Solves
Structure lock
MiDaS depth + LineArt → 2× ControlNet
keeps the real geometry so the AI can’t invent a new room
Style injection
IPAdapter (reference image) + text prompt
supplies the material/palette that the prompt alone can’t describe
Temporal coherence
AnimateDiff (looped uniform context)
stops the per-frame flicker you get from frame-by-frame img2img
Seamless tiling
circular padding on model + VAE, x_only
left/right edges match for wrap-around projection
Plus a sequenced batch loader so a 5000-frame shot can be rendered 64 frames at a time without running out of VRAM, and an image-sequence saver so the result stays as frames (no video encoding, no generation loss) for the edit.
2. Pipeline, in order
Workflow pipeline — from sequence loading to image-sequence save
3. Why each block is in there
3.1 Sequenced loader (the part everyone gets wrong)
PrimitiveInt is set to increment. Its value goes through MathExpression: a * 64 into the loader’s skip_first_frames. frame_load_cap is 64.
So each time you press Queue, ComfyUI renders the next 64 frames:
Queue #
PrimitiveInt
skip_first_frames
frames rendered
1
0
0
0–63
2
1
64
64–127
3
2
128
128–191
Combined with Auto Queue this walks through an arbitrarily long sequence at constant VRAM.
Reset PrimitiveInt to 0 before starting a new sequence, otherwise you silently resume from wherever the last job stopped. If you change frame_load_cap, change the * 64 multiplier to match — they must be identical or you skip or duplicate frames.
The loader also does the first downscale (1920×1080), and ImageScale takes it to the actual render resolution of 768×432. SD 1.5 is trained at 512², so 768×432 is roughly the largest 16:9 frame you can push before geometry starts repeating; the upscaler recovers the resolution at the end.
3.2 Two ControlNets, deliberately unequal
ControlNet
Preprocessor
Strength
start → end
Job
control_v11f1p_sd15_depth
MiDaS (bg_threshold 0.1, res 768)
0.55
0.10 → 0.80
volume, spatial layering, where things are in space
The canny ControlNet is fed LineArt, not Canny. Canny on a mossy, noisy concrete photo produces thousands of texture edges, and the model dutifully draws every one of them — you get a traced photo. LineArt returns clean structural contours and ignores surface grain, which is exactly what you want when the surface is about to be replaced anyway.
Neither starts at 0.0. Depth kicks in at 10 %, lineart at 20 %. The first steps are left free so the model can commit to the material before structure is imposed. Start both at 0 and the output looks like painted concrete instead of tissue.
Depth ends at 0.80 so the last 20 % of sampling is unconstrained — that is where the organic detail actually forms.
ScaledSoftControlNetWeights (0.825) feeds both loaders. It ramps ControlNet influence across the UNet blocks instead of applying it flat, which is the main defence against the “AI traced over my photo” look.
The text prompt can describe what (fleshy tendons, Voronoi cells, turquoise veins) but it cannot pin down the exact palette, the sheen on the bubbles, or the specific way the membranes catch light. The reference image does that. Weight 0.8 is high — this workflow is style-led, the prompt only steers.
ease in-out weights the reference more in the middle of sampling, less at the start and end, which keeps it from fighting the ControlNets early or muddying the fine detail late.
PrepImageForClipVision (LANCZOS, center crop, 0.01 sharpening) is not optional — CLIP Vision wants 224², and feeding it a raw 5504×3072 image without a proper centre crop throws away most of the reference.
3.4 Seamless X tiling for 4-wall projection
Three nodes work together:
Apply Circular Padding Model — swaps the UNet’s convolutions to circular padding
Apply Circular Padding VAE — same for the VAE, so the encode/decode doesn’t re-introduce a seam
CircularVAEDecode with x_only — restricts the wrap to the horizontal axis
Horizontal only, because the image wraps around four walls but the floor and ceiling are not continuous. Enable Y as well and you get a visible smear where the ceiling tries to meet the floor.
Both padding nodes must be active — patching only the model leaves a faint seam that the VAE reintroduces at decode, and it is very hard to spot until it is projected two metres wide.
ADE_AnimateDiffLoRALoader — v2_lora_ZoomIn.ckpt at 0.45
AnimateDiff here is not generating the motion — the source footage already has a moving camera. Its job is temporal coherence: the 16-frame context window with 8 frames of overlap means every frame is denoised with knowledge of its neighbours, so the tissue textures stay attached to the same surfaces instead of boiling.
motion_scale 0.8 (below the default 1.0) deliberately damps AnimateDiff’s own motion so it doesn’t fight the camera move that is already in the plate.
The ZoomIn motion LoRA at 0.45 adds a slow inward push on top of the source camera move. It is subtle at that weight — a drift, not a zoom. Set it to 0 if your source already moves enough.
Note that the latent comes from VAEEncode of the source frames, not from an empty latent — this is img2img. denoise 0.90 leaves 10 % of the original image in the mix, which is enough to anchor the lighting and contrast to the plate without letting the concrete show through.
cfg 8.5 is high for SD 1.5, but it is compensating for two ControlNets and an IPAdapter all pulling in different directions.
more_details LoRA at 0.6/0.6 is on the base model — it is there because the render resolution (768×432) is low and the model needs help producing texture that survives a 4× upscale.
3.7 Output
Image Save (WAS Node Suite) writes a numbered JPG sequence at quality 100, 5-digit padding: styleTransfer_00001.jpg, styleTransfer_00002.jpg, …
Frames, not video, on purpose: – the batch loader produces the shot in chunks; a video node would produce a pile of clips to splice – no inter-frame compression before the edit – a failed chunk can be re-rendered and dropped in without touching the rest
4x-UltraSharp runs before the save, taking 768×432 to 3072×1728.
The MiDaS preprocessor downloads its own weights on first run.
The checkpoint path in the workflow is SD1.5\dreamshaper_8.safetensors — it expects a SD1.5 subfolder inside models/checkpoints/. Either create it or re-pick the checkpoint in the node.
5. Setup
ComfyUI/
├── input/
│ ├── stairway_seq/ <- your source frames (jpg or png, numbered)
│ └── neuronWithBubbles_ref.jpeg <- the style reference
└── output/
└── styleTransfer/ <- created on first save
All paths in the workflow are relative to the ComfyUI root, so it loads and runs on any machine without editing. If your LoadVideosFromFolder build insists on an absolute path, replace input/stairway_seq with the full path — that is the only node that may need it.
6. Running it
Drop the source frames into ComfyUI/input/stairway_seq/.
Load LCM_ip_ctrl_transfer.json.
Set PrimitiveInt to 0.
Queue once. Check the first 64 frames before committing to the whole shot.
Happy with it? Turn on Auto Queue and let it walk the sequence.
Reset PrimitiveInt to 0 before the next shot.
Do a lookdev pass first. Bypass the batch stepping, set frame_load_cap to 16, and iterate on prompt / IPAdapter weight / denoise until a 16-frame chunk looks right. A full shot at these settings is not something you want to discover was wrong at frame 3000.
7. What to tune
Parameter
Node
Value
Effect
denoise
KSampler
0.90
↓ keeps more of the original photo, ↑ more invention. Below ~0.75 the concrete starts showing.
weight
IPAdapterAdvanced
0.80
how hard the reference image drives the look. 0.5–0.6 lets the prompt lead instead.
strength
ControlNet (depth)
0.55
↑ locks volume harder, ↓ lets the geometry melt
strength
ControlNet (lineart)
0.65
↑ preserves edges, ↓ softens architecture into organic mass
start_percent
both ControlNets
0.10 / 0.20
↑ gives the style more freedom early — the single most effective knob
motion_scale
AnimateDiff
0.80
↑ more independent motion, ↓ follows the plate more closely
strength
ZoomIn motion LoRA
0.45
the slow inward drift. 0 disables it.
context_length / overlap
LoopedUniformContext
16 / 8
↑ overlap = smoother but slower; 8/16 is the usual sweet spot
frame_load_cap + a * N
loader + MathExpression
64
chunk size — must match each other
8. Prompt variations
Four Note nodes in the workflow carry the prompt variants that were tried. The active one is the oxygen bubble version; the others are kept because they change the result substantially:
base — fleshy tendons, Zaha Hadid fluid architecture, Voronoi cellular pattern, metal datacables, turquoise veins, hazy blue void, dreamcore / Y2K surrealism
oxygen bubbles(active) — adds iridescent translucent bubbles trapped in the tissue, chromatic aberration, prismatic reflections
Recurring negatives: grainy, noise, grit, dots, dither, low-res textures (1.5) and glow, neon, vibrant lights (1.4). The anti-glow weight matters — SD 1.5 will make anything described as “organic network” glow like a screensaver unless you actively suppress it.
9. Troubleshooting
Symptom
Cause
Fix
Output looks like a traced photo
ControlNets too strong, or starting at 0.0
raise start_percent, lower lineart strength
Textures boil / flicker between frames
AnimateDiff context too short or overlap too small
raise overlap to 8+, check the motion model actually loaded
Visible vertical seam when wrapped
only one circular padding node active
both Apply Circular Padding ModelandVAE must be on
Frames skipped or duplicated
frame_load_cap ≠ MathExpression multiplier
make them identical
Second run starts mid-sequence
PrimitiveInt not reset
set it back to 0
Everything glows neon
SD 1.5 default behaviour for organic prompts
keep the anti-glow negative weights up
OOM
64-frame chunks at 768×432 need real VRAM
lower frame_load_cap and the multiplier together
10. License
Workflow and documentation — MIT. Use it, change it, ship it commercially, no attribution required (though it is appreciated).
Example images (stairway_seq_000000.jpg, neuronWithBubbles_ref.jpeg, stairway_brained_out.jpg) — CC BY 4.0. Share and adapt with credit.
Models, LoRAs and custom nodes referenced by the workflow are not covered by either — each has its own terms. Check them before commercial use.
Built and rendered on ComfyUI 0.3.14 / frontend 0.6.0, RTX 4090. Roughly 20 GB VRAM at 64 frames × 768×432.
The workflow ships with embed_workflow enabled on the saver, so every output JPG carries the graph that produced it — drag one into ComfyUI to get the exact settings back.
A Non-Destructive Object Compositing Workflow for ComfyUI
Placing a cut-out into a background plate with FLUX.2 Klein, without re-rendering the frame.
I have released a ComfyUI workflow that performs a fairly ordinary Photoshop task: it takes an object with an alpha channel, places it into a background plate, and makes it look as though it had been photographed or rendered in that environment. The model is given a narrow job — compute the lighting, the reflected ambient colour and the contact shadows — and is prevented from touching anything else.
The obvious objection is that current image-editing models do this better. Nano Banana, GPT-Image and comparable autoregressive systems are faster and produce more convincing integration than a 9B distilled diffusion model working through a mask. That objection is correct, and the workflow is not an attempt to refute it. It addresses a narrower set of circumstances in which those systems are not available or not appropriate.
The first is that a conversational image editor re-renders the entire frame. Global tone, grain, sharpness and colour shift slightly across the whole image, and the returned resolution is whatever the service decides to provide. When the surrounding plate is finished work that must not change, this is a real cost rather than a theoretical one.
The second is price. Output above roughly 2K is typically behind a paid tier, and high-resolution work is precisely where the cost accumulates.
The third is confidentiality. Client plates, unreleased product renders and material under non-disclosure cannot be uploaded to a third-party API, regardless of how good that API is.
The fourth is procedural. If the intention was always to mask the result back onto the original afterwards, it is more economical to build the mask into the generation than to reconstruct it by hand once the model has finished.
The workflow runs entirely on local hardware, composites through an explicit mask, and colour-matches the generated region back to the untouched plate. Outside the feathered mask edge, the output file is pixel-identical to the input file.
What the workflow does
The pipeline follows the logic of a layered Photoshop document rather than that of a generative prompt.
The object is loaded as a transparent PNG. ComfyUI separates such a file into an image and a mask on load, so the two are padded to the plate’s dimensions and rejoined into a single RGBA image; a cut-out therefore does not need to match the plate’s canvas size. A transform node scales, rotates and positions it, and the result is flattened onto the plate. At this point the composite is deliberately crude — a hard-edged paste-up, exactly what a layer looks like before any retouching.
The object’s alpha is then converted into a mask, expanded and feathered. That expansion is the working area: the room the model is permitted to use for cast shadows and light spill. The model receives the flattened composite together with this mask, and at a reduced denoise value it is obliged to treat the existing pixels as an anchor. Its task is reduced to calculating the illumination.
Two subsequent stages do the work that determines whether the result is usable.
The first is colour correction. Because the plate passes through the variational autoencoder during sampling, and VAE round-trips desaturate, the decoded region no longer matches the surrounding image. The workflow measures the colour statistics of the untouched part of the plate — using the inverted mask as a reference region — and pulls the generated area back to them in LAB space, which behaves more predictably for this operation than RGB.
The second is the composite itself. The colour-corrected region is pasted onto the original background file through a heavily blurred mask. Everything outside that feathered edge is the original pixel data, unmodified. The workflow ships with a comparison slider and a difference map so that this can be verified rather than taken on trust; the difference map is near-black by design, which is the point.
[image: a screenshot of the graph in ComfyUI with comments in English and Hungarian]
Three things that were not obvious
Documenting the workflow surfaced several details that are worth stating plainly, because they are the sort of thing that costs an evening to rediscover.
Mask polarity is inverted relative to intuition. ComfyUI’s LoadImage node returns MASK = 1 − alpha, and JoinImageWithAlpha inverts it back. In that convention zero means opaque and one means transparent — the opposite of the selection-style masks used elsewhere in the same graph. Padding an alpha channel with a black canvas therefore produces an opaque black border rather than a transparent one. The published graph contains two SolidMask nodes with opposite values for exactly this reason.
One denoise value is asked to govern two different decisions. How much the object itself may change and how much the ground beneath it may change are separate questions with separate correct answers. A cast shadow tolerates complete freedom; the object’s geometry does not. The workflow splits the mask into two tiers — full authority in the halo around the object, reduced authority over the object body — so that the two can be set independently.
Step count and denoise are coupled. The effective number of denoising steps is approximately steps × denoise, and a distilled model still requires around four of them. Reducing denoise to 0.5 while leaving the step count at 4 yields two effective steps and a noisy result. The step count has to be raised to compensate. This is a common enough mistake that it is worth stating explicitly.
Requirements and limitations
The workflow is built on FLUX.2 Klein 9B in fp8, which uses Qwen 3 8B as its text encoder and requires its own dedicated VAE. Four ComfyUI node packs are needed; the README lists them with links, and ComfyUI Manager will resolve them automatically once the workflow is loaded.
The limitations are worth stating as plainly as the capabilities.
It does not outperform a modern autoregressive editor on integration quality. It outperforms them on control, colour fidelity, privacy and cost.
VRAM consumption scales with the full canvas unless the crop-and-stitch stage is enabled, because the entire plate is encoded during sampling. With that stage active the model samples only the masked region at native resolution, which is both the memory fix and the quality fix on large images.
It places a cut-out; it does not create one. The alpha channel is an input, not an output.
It cannot correct perspective. The model computes light, not geometry. If the object’s camera angle disagrees with the plate’s, no denoise value will reconcile them — that is a ControlNet or a 3D-rendering problem.
Finally, the supplied parameter values are a starting point rather than a tuned recipe. They are the values that produced the bundled example. The correct settings are image-dependent, and the reasoning behind the trade-offs is annotated directly on the graph.
Availability
The workflow, an annotated graph, example images and full documentation are available at https://github.com/tenpel/ComfyUI-PS-Composite under the MIT licence. The models and node packs it depends on carry their own separate licences.
The graph is annotated in English and Hungarian throughout. It is intended to be read as much as run.